
Block Buster Quilt Blocks are a wonderful way to transform traditional patchwork techniques into a bold quilt design filled with movement, contrast, and personality. The block shown in the reference image combines a beautiful central focal fabric with carefully arranged half-square triangle units in coordinating purple and floral prints. The result creates the appearance of a framed center surrounded by geometric points and corners. Although the finished block looks detailed, its construction is based on straightforward units that can be prepared individually and then assembled into rows, making the design approachable for quilters who already understand basic cutting and piecing.
One of the most attractive features of Block Buster Quilt Blocks is the opportunity to showcase a favorite fabric in the center. In this example, a bird-and-flower print becomes the visual focus, while cream floral fabric and several shades of purple create the surrounding geometric framework. This technique is especially effective with fussy-cut fabric, where a specific portion of a print is deliberately centered before cutting.
The surrounding patchwork is equally important because it creates the strong visual structure that makes this quilt block pattern stand out. Purple triangles point toward the center from the top, bottom, left, and right, while additional triangle units complete the corners. Careful color placement makes these simple geometric shapes appear connected, producing a sophisticated frame without requiring extremely complicated piecing.
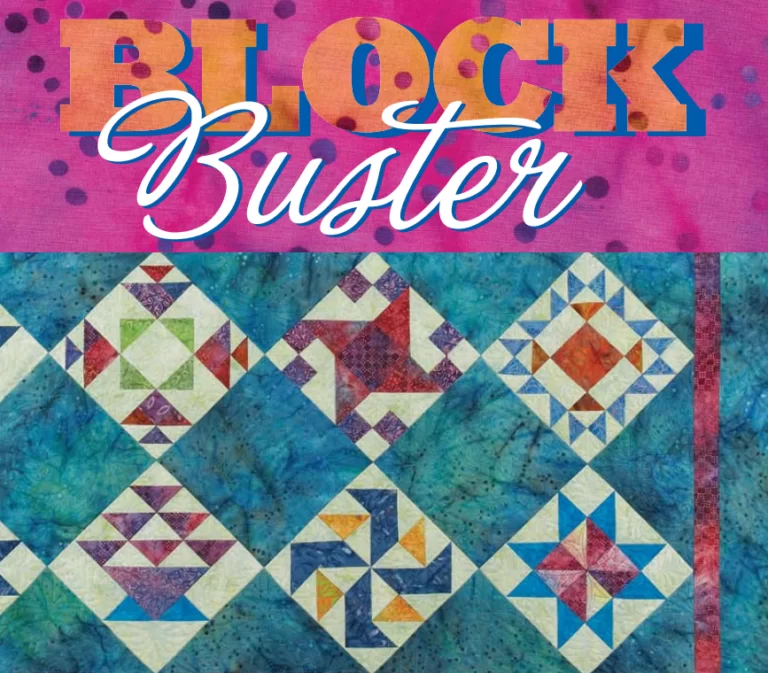
Choosing Fabrics and Planning Block Buster Quilt Blocks
Begin your Block Buster Quilt Blocks project by selecting a focal print. The center is visually dominant, so choose fabric with a motif that deserves attention. The bird-and-floral fabric in the reference design works particularly well because the surrounding colors are repeated in the patchwork. This connection between the center and outer fabrics makes the completed block feel intentional and balanced.
Next, choose a light background fabric. In the pictured block, a cream floral print provides contrast against the rich purple triangles without appearing completely plain. A low-volume print is an excellent alternative to solid fabric because it adds subtle detail while allowing the darker geometric shapes to remain prominent. White, cream, pale gray, or another light neutral could produce a similar effect.
Select at least one darker fabric for the primary triangles. Using two or more related purple prints, as suggested by the reference image, creates additional depth. One purple can be slightly darker or more textured than another while still belonging to the same general color family. This controlled variation keeps the patchwork quilt block interesting without making the composition look disconnected.
Before cutting, decide on the finished size of your block. Rather than relying exclusively on measurements taken from a photograph, choose a practical finished dimension and calculate your individual units accordingly. Remember to include the appropriate seam allowance when cutting. In traditional quilting, an accurate quarter-inch seam is commonly used for piecing, and consistency is essential for keeping all sections aligned.
For the center, carefully position your ruler over the focal fabric before cutting. If you are using a directional print, pay attention to orientation. The birds or flowers should appear upright in the finished block unless you intentionally want another arrangement. This process of selectively positioning a motif is known as fussy cutting, and it can dramatically improve the appearance of a feature block.
Finally, arrange the unsewn fabrics together before beginning construction. Look at the design from a short distance and make sure there is enough contrast between the background and triangle fabrics. Strong value contrast is one of the reasons the purple geometry is so visible in the reference block. If two fabrics blend together too much, consider replacing one before you invest time in cutting and sewing.
Making the Half-Square Triangle Units Step by Step
The geometric framework of Block Buster Quilt Blocks relies heavily on half-square triangles, often abbreviated as HSTs. A half-square triangle is a square patchwork unit composed of two right triangles sewn together diagonally. It is one of the most useful units in quilting because changing its orientation can create stars, diamonds, arrows, pinwheels, and countless other designs.
A beginner-friendly method starts with two fabric squares placed right sides together. Pair a light background square with a purple square. On the wrong side of the lighter fabric, draw a diagonal guideline from one corner to the opposite corner. This line serves as a reference while sewing and helps keep the diagonal accurate.
Sew a quarter-inch seam on each side of the marked diagonal line. After both seams are complete, cut directly along the drawn center line. When you open the pieces, you will have two matching half-square triangle units. Press the seam carefully toward the darker fabric or press it open according to your preferred quilting method.
Trim each HST to the exact unfinished size required for your block. This step is worth the extra time. Small inconsistencies can multiply when several units are joined together, causing points to disappear or rows to become different lengths. Use the diagonal marking on a quilting ruler to confirm that the seam runs precisely from corner to corner before trimming all four sides.
Repeat the process until you have enough units to surround your center square. Referring to the pictured arrangement, some units place the purple triangle toward the center, while others position it toward an outside corner. Orientation is therefore just as important as construction. A perfectly sewn HST placed in the wrong direction will change the overall pattern.
Once all the units are trimmed, lay them around the center without sewing anything together. Recreate the visual structure of the reference block by forming purple points at the middle of each side and coordinating triangles at the corners. Take a quick photo of the arrangement if helpful. Having a visual reference can prevent accidental rotations when you move the pieces to your sewing machine.
Assembling the Block Buster Quilt Block
With all components prepared, begin assembling your Block Buster Quilt Blocks systematically. Keep the focal square in the center and arrange the surrounding pieces exactly as they will appear in the finished block. Working from a complete layout is safer than picking up individual units from a stack because several HSTs may look identical until their orientation changes.
Start joining neighboring units into manageable sections. Pinning can be useful where diagonal seams need to meet. Place the fabric pieces right sides together and sew with a consistent quarter-inch seam allowance. Avoid stretching the bias edges of triangle units, as diagonal fabric edges can distort more easily than straight-grain edges.
Press each completed seam before joining it to another section. Good pressing is one of the simplest ways to improve quilt block accuracy. Instead of aggressively moving the iron back and forth, lift and press the fabric so the units retain their original dimensions. Excessive movement can stretch diagonal seams and cause the block to become distorted.
Continue building the surrounding sections until they can be attached to the central focal square. Watch the points where the purple triangles approach the center. Maintaining an accurate seam allowance will help preserve these points instead of cutting them off. If necessary, use pins to match important intersections before sewing.
Once the central and surrounding sections are assembled, join the remaining rows or larger units to complete the square. Match seams carefully and check the orientation again before every major seam. In this design, the dark triangles should visually create strong geometric shapes surrounding the featured bird or floral center.
After the final seam is sewn, press the complete Block Buster Quilt Block and place it on a flat surface. Measure it vertically, horizontally, and diagonally. If necessary, carefully square the block using a large quilting ruler. Avoid trimming excessively, especially near triangle points, because you want to preserve enough seam allowance for joining the block into a larger project.
Finishing and Using Block Buster Quilt Blocks
Once you have successfully completed one Block Buster Quilt Block, you can use it as a guide for additional blocks. Record your cutting dimensions, fabric combinations, HST size, and any construction adjustments you made. Keeping these notes saves time and helps maintain consistency when creating a larger quilt.
For a full quilt, consider repeating the same block with different center prints. This creates a beautiful fussy-cut quilt in which every block highlights a different bird, flower, animal, or decorative motif. Keeping the surrounding fabrics consistent will visually connect the individual centers and give the finished quilt a cohesive appearance.
Another possibility is changing the surrounding colors from block to block. Purple might become blue, red, green, or another color found in the central fabric. If you choose this approach, consider keeping the background consistent. A repeated neutral background can provide continuity even when the accent colors change dramatically.
These patchwork blocks can also be used individually. One large block can become a decorative pillow front, table topper, wall hanging, tote bag panel, or centerpiece for a larger quilt design. This makes the pattern useful when you want to practice the technique without committing immediately to an entire bed-size quilt.
When assembling multiple blocks into a quilt top, you can sew them directly together or add sashing between them. Sashing gives each block additional visual space and can emphasize the individual framed motifs. A narrow neutral sashing produces a subtle separation, while a darker color can create a stronger grid across the quilt.
Before quilting the finished top, inspect every seam and remove loose threads. Add batting and backing using your preferred quilt-finishing method, then quilt in a way that complements the geometry. Straight-line quilting can emphasize the triangular structure, while free-motion quilting can introduce softer curves that contrast beautifully with the angular Block Buster Quilt Blocks.
FAQ About Block Buster Quilt Blocks
Are Block Buster Quilt Blocks suitable for beginners?
Yes, particularly for beginners who already understand basic rotary cutting and quarter-inch seams. The design may look complicated, but much of its visual impact comes from repeating half-square triangle units. Practicing a few HSTs before beginning the final block can make construction much easier.
What is a half-square triangle in quilting?
A half-square triangle, or HST, is a square made from two triangular pieces of fabric divided along the diagonal. HSTs are extremely versatile and appear in many traditional and modern quilt patterns.
What fabric works best for the center of this quilt block?
A medium- or large-scale print with a recognizable motif is an excellent choice. Floral designs, birds, animals, holiday illustrations, and novelty prints work especially well when they can be fussy cut to highlight an attractive section.
What does fussy cutting mean?
Fussy cutting means deliberately positioning a specific part of a printed fabric inside a quilt patch. Instead of cutting randomly, you center the desired image beneath the ruler before cutting. This technique is particularly useful for the focal center of this design.
Why are my half-square triangles too small?
HSTs can become undersized because of an inaccurate seam allowance, cutting errors, excessive trimming, or fabric distortion. Many quilters prefer to make their units slightly oversized and then trim them precisely to the required unfinished dimensions.
How do I keep triangle points from disappearing?
Accurate cutting and consistent quarter-inch seams are essential. Before sewing across an important point, check where the diagonal seams intersect. Proper alignment leaves enough space beyond the point for the next seam allowance.
Should I press quilt seams open or to one side?
Both methods can work depending on the construction. Pressing toward the darker fabric is common, while pressing seams open can reduce bulk in areas with many intersections. Consistency and accuracy are more important than following one method for every project.
Can I make Block Buster Quilt Blocks in different colors?
Absolutely. The purple and cream combination provides strong contrast, but the same arrangement can work with almost any coordinated palette. Try blue and white, red and cream, green and beige, or use colors taken directly from your focal print.
Can I use scraps for this quilt block?
Yes. The triangle units make this pattern suitable for incorporating fabric scraps, especially when the scraps are large enough to cut accurate squares. A consistent background can help unify a variety of scrap fabrics.
What can I make with a single Block Buster Quilt Block?
A single block can become a pillow cover, wall hanging, table mat, bag panel, or the center of a medallion-style quilt. You do not need to create dozens of blocks to enjoy the design.
Conclusion
Block Buster Quilt Blocks demonstrate how relatively simple patchwork units can create a sophisticated geometric frame around a beautiful focal fabric. By combining an eye-catching center square, contrasting background fabric, and carefully positioned half-square triangles, you can reproduce the strong visual effect seen in the reference design while adapting the colors and motifs to your own style.
Throughout this tutorial, you learned how to select coordinating fabrics, use fussy cutting for the center, construct accurate HST units, control their orientation, assemble the surrounding sections, press the seams, and square the completed block. Careful cutting and a consistent quarter-inch seam are particularly important because they help the triangle points remain crisp and the finished block stay balanced.

