
Shooting Star Quilt Block Pattern is a beautiful patchwork design that captures the feeling of a bright star traveling across the night sky. With pointed geometric units, contrasting fabrics, and carefully planned color placement, this block can create a wonderful sense of direction and movement. Unlike a perfectly symmetrical star that remains centered within the block, a shooting-star-inspired layout can use extended points, diagonal elements, or trailing shapes to suggest motion. The result is a versatile design that can look traditional when made with classic quilting prints or distinctly modern when created with solids, bold colors, and generous negative space.
One of the most exciting parts of making a Shooting Star Quilt Block Pattern is selecting the fabrics. A bright star in yellow, gold, white, or cream can stand dramatically against navy, charcoal, deep blue, or black, creating the impression of a star glowing in a nighttime sky. For a softer quilt, pastel backgrounds and low-volume prints can create a more delicate effect. You can also use scraps to make every star different, allowing small pieces from previous projects to become part of a coordinated quilt. Whatever palette you choose, sufficient contrast between the star and background is essential for keeping the characteristic star shape clearly visible.
The Shooting Star Quilt Block is also an excellent project for practicing essential patchwork skills, particularly half-square triangles, flying geese units, accurate cutting, quarter-inch seam allowances, chain piecing, pressing, trimming, matching points, and block assembly. The exact arrangement can vary according to the version of the design you want to create, but the general process remains approachable: prepare the background and star fabrics, construct pointed geometric units, arrange them to establish movement, sew the block in sections, and carefully match the intersections. This tutorial guides you through each stage before explaining how to turn individual blocks into a complete quilt.
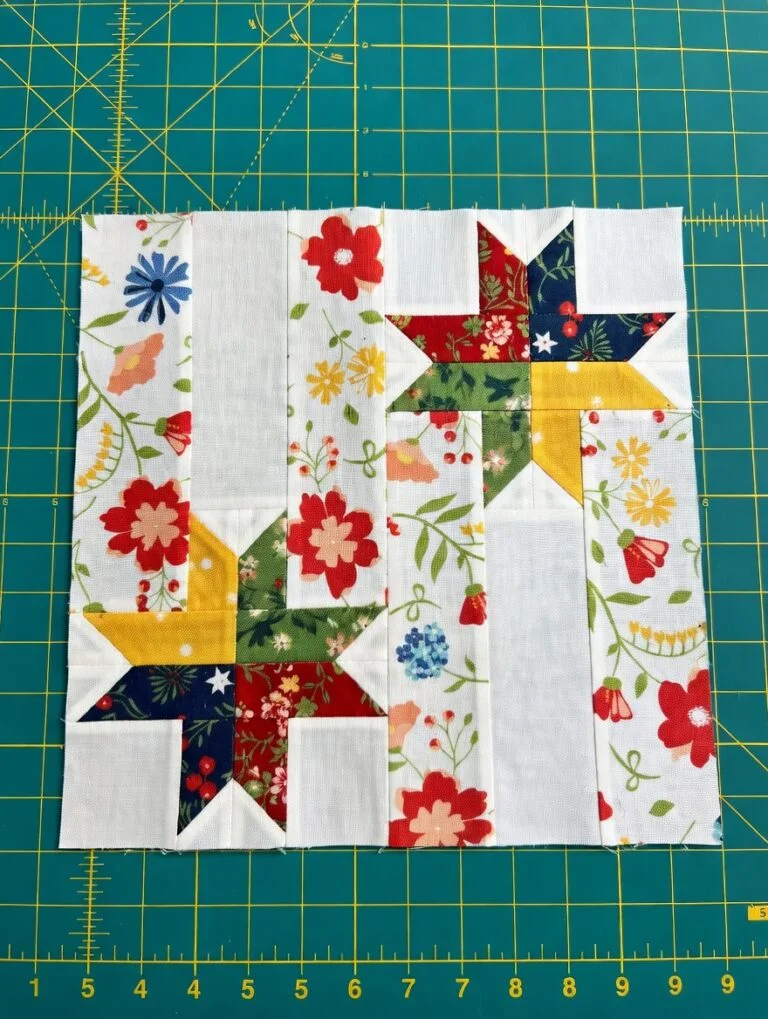
Choosing Fabrics and Preparing the Shooting Star Block
Begin your Shooting Star Quilt Block Pattern by choosing quality quilting cotton. A stable woven fabric makes accurate cutting easier and helps prevent unwanted stretching while working with triangle-based patchwork pieces.
Select a background fabric and one or more fabrics for the star. High contrast usually produces the strongest result. For example, a golden star against deep navy can immediately suggest a glowing star crossing a dark sky.
If you prefer a colorful design, use several coordinated fabrics within the star. Yellow, orange, coral, and red can create a warm progression, while turquoise, blue, violet, and lavender can produce a cooler contemporary interpretation.
A scrappy Shooting Star Quilt is another excellent option. Organize your scraps according to color value rather than trying to match every print. Keeping the star fabrics noticeably lighter or darker than the background helps preserve the overall shape.
Prepare a rotary cutter, self-healing cutting mat, acrylic quilting rulers, sewing machine, coordinating thread, iron, and pins or clips. A square ruler with a diagonal guideline is especially helpful for trimming half-square triangles.
Cut the required squares, rectangles, and other pieces according to your desired finished block size. Before cutting fabric for an entire quilt, make one test block. This allows you to verify the dimensions, proportions, seam allowance, and overall appearance.
Sewing the Shooting Star Quilt Block Step by Step
Begin by constructing the pointed units that form the star. Many versions can be built using half-square triangles (HSTs) and flying-geese-style sections, making these familiar quilting techniques particularly useful for creating sharp geometric angles.
For a basic HST, place two contrasting squares right sides together. Mark a diagonal guideline and sew according to your preferred half-square triangle construction method. Cut as required, open the unit, and gently press the seam.
Trim each HST to the required unfinished dimensions. Position the ruler’s diagonal line directly over the seam before trimming. Accurate units make it much easier to maintain crisp points when the complete Shooting Star Block is assembled.
Next, construct the flying-geese-style sections or elongated units that create the star’s directional movement. Pay attention to the seam allowance beyond each point. Removing too much fabric can cause the point to disappear during final assembly.
Arrange all completed units on a flat surface before sewing them together. Rotate the pieces until the star and its visual trail move in the desired direction. Take a quick reference photo if the arrangement contains several similar-looking units.
Sew the components into rows or larger sections using a consistent quarter-inch seam allowance. Press carefully after each stage, then join the sections while matching important seams. Finish by pressing the completed block flat without aggressively stretching the angled pieces.
Arranging Shooting Star Blocks Into a Complete Quilt
After completing your first Shooting Star Quilt Block, measure it carefully. Check that the block is square and confirm that the important star points still have enough seam allowance around the outer edges.
Continue making blocks using the same construction process. Chain piecing repeated units can improve efficiency when making a larger quilt. Keep pieces organized by block if you are using several different star colors.
Once all the blocks are complete, place them on a design wall, large table, or clean floor. Experiment with orientation before joining anything permanently. Rotating individual blocks can make the stars appear to travel in several different directions.
For a coordinated Shooting Star Quilt, consider arranging the blocks so the stars appear to move diagonally across the entire quilt. Alternatively, rotate them randomly to create the feeling of a sky filled with multiple shooting stars.
Pay attention to the distribution of color and value. If several bright stars are concentrated in one section, move some blocks until the visual weight feels more balanced. Photographing the layout can help you preserve the final arrangement.
Join the blocks into rows using an accurate quarter-inch seam. Add sashing between blocks if you want additional negative space around the stars. Finally, sew the rows together, press the completed quilt top, and add optional borders if desired.
Quilting, Binding, and Creative Shooting Star Variations
Prepare backing and batting slightly larger than the finished quilt top. Place the backing wrong side up, position the batting over it, and center the Shooting Star Quilt top with the right side facing upward.
Smooth the layers from the center toward the outside and baste them securely. Proper basting is important because it prevents the layers from shifting while the quilt is moved through the sewing machine.
Straight-line quilting is an excellent choice for this geometric design. Diagonal lines can reinforce the feeling of movement and make the stars appear to travel across the surface of the quilt.
You can also use echo quilting around each star. Repeating the outline at regular intervals emphasizes the shape while creating additional texture in the background. Simple quilting often allows detailed patchwork to remain the main attraction.
After quilting, trim the excess backing and batting. Prepare binding strips and join them into one continuous length. Sew the quilt binding around the perimeter, carefully forming each corner before completing the final join.
Use the basic Shooting Star Quilt Block Pattern to create different projects and styles. Try rainbow stars, monochromatic stars, celestial blues, scrappy stars, oversized blocks, or minimalist solids. Individual blocks can also become pillows, table toppers, wall hangings, or tote bag panels.
FAQ About the Shooting Star Quilt Block Pattern
Is the Shooting Star Quilt Block Pattern suitable for beginners?
Yes, especially for confident beginners who already understand straight seams and basic patchwork. Triangle units require some precision, but working slowly and trimming each unit makes the construction more manageable.
What fabric works best for a Shooting Star Quilt?
Quality quilting cotton is a reliable choice because it is stable, easy to cut accurately, and responds well to pressing.
What is a half-square triangle?
A half-square triangle, or HST, is a square patchwork unit made from two triangular fabrics joined diagonally. It is frequently used to create star points and other geometric designs.
What are flying geese in quilting?
Flying geese are rectangular patchwork units featuring a central triangle with smaller triangles at the sides. They are commonly used to form star points and directional geometric elements.
How can I make the shooting star effect stronger?
Use strong contrast and arrange pointed or elongated units so they create a clear diagonal direction. Color gradients can also help suggest movement.
Can I use fabric scraps for this pattern?
Absolutely. A scrappy Shooting Star Quilt can be especially attractive. Try organizing scraps by value or color family to maintain enough contrast.
Why are my star points disappearing?
The seam may be crossing too close to the point, or the point may not have enough seam allowance beyond it. Check your units before joining the final rows.
Why are my blocks different sizes?
Small cutting errors, inconsistent seam allowances, and incorrectly trimmed triangle units can accumulate. Measure components during construction instead of waiting until the block is finished.
How do I get accurate half-square triangles?
Many quilters make HSTs slightly oversized and trim them to the exact unfinished dimensions. Align the ruler’s diagonal guideline with the seam while trimming.
Should I press seams open or to one side?
Either approach can work. Pressing to opposite sides can help neighboring seams nest, while pressing open can reduce bulk at complicated intersections.
Can I add sashing between the blocks?
Yes. Sashing can provide negative space and help each individual Shooting Star Block stand out more clearly.
What colors work well for a celestial quilt?
Navy, midnight blue, charcoal, violet, black, white, silver-inspired gray, yellow, and gold tones can create a strong celestial theme, although virtually any coordinated palette can work.
What quilting design should I use?
Straight diagonal lines, echo quilting, geometric grids, or gentle flowing lines can all complement the shooting-star theme.
Can I make a project with only one block?
Yes. A single Shooting Star Quilt Block can become a pillow cover, mini quilt, wall hanging, table centerpiece, tote bag panel, or other decorative project.
Conclusion
The Shooting Star Quilt Block Pattern combines classic geometric patchwork with a wonderful sense of movement. By carefully arranging pointed units, contrasting colors, and directional shapes, you can create a star that appears to travel across the block rather than simply remain centered. This visual effect makes the pattern especially suitable for celestial quilts and creative modern layouts.
Throughout this tutorial, you learned how to choose quilting fabrics, prepare accurate pieces, construct half-square triangles and flying geese, preserve sharp star points, maintain a consistent quarter-inch seam allowance, assemble the block, arrange multiple blocks into a quilt top, prepare the quilt sandwich, add quilting, and finish the project with binding. Careful trimming and thoughtful color placement are particularly valuable for keeping the design crisp and recognizable.

