
Crochet Baby Booties Pattern is a sweet and practical project for creating soft handmade footwear for little feet. Baby booties are especially enjoyable to crochet because they require relatively small amounts of yarn, work up quickly, and offer plenty of opportunities for personalization. A simple pair can be made in classic white, cream, or pastel shades, while brighter colors, contrasting cuffs, stripes, and small decorative details can create a completely different appearance. Handmade crochet baby booties can also make a thoughtful addition to a baby gift set when created with comfortable, washable materials.
The construction of a Crochet Baby Booties Pattern becomes much easier to understand when the project is divided into sections. Many designs begin with an oval sole created around a foundation chain. The sides are then worked upward in rounds, followed by decreases that shape the toe. Finally, the ankle and cuff are completed to help give the bootie its recognizable form. Because babies’ feet vary considerably, measurements and gauge are more dependable than assuming that one universal stitch count will fit every child. The booties should remain comfortably roomy without being tight around the foot or ankle.
This tutorial uses standard US crochet terms and focuses on techniques that can be useful for many other crochet projects. You will practice chain stitch, single crochet, half double crochet, double crochet, slip stitch, increases, and decreases, as well as working in rounds and finishing yarn ends. The design can be customized according to the yarn, hook, gauge, and size required. When making items for babies, prioritize softness and secure construction, and avoid loose or easily detachable decorations. With careful stitching and simple shaping, you can create an adorable pair of booties from beginning to end.
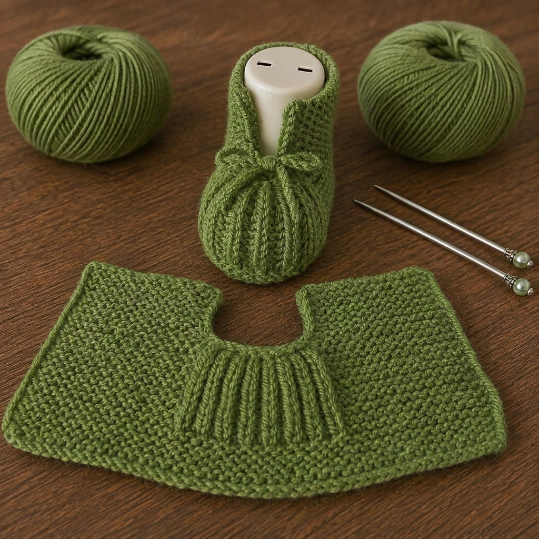
Materials and Basic Stitches for Crochet Baby Booties
Begin your Crochet Baby Booties Pattern by selecting soft yarn that is appropriate for items worn next to delicate skin. A smooth, washable yarn can make the finished booties easier to care for and helps the individual stitches remain clearly visible while you work.
Light or medium-light yarn can work especially well for small booties because it provides warmth without creating an excessively heavy fabric. Always check the yarn label for fiber content, recommended care, and suggested hook sizes before beginning.
Choose a crochet hook that creates a comfortable but relatively firm fabric. If the stitches are extremely loose, the booties may lose their shape. If they are too tight, the fabric can become stiff and uncomfortable.
You will also need scissors, a yarn needle, measuring tape, and stitch markers. A marker placed at the beginning of each round is extremely useful because some parts of the baby booties can be worked continuously.
The single crochet (sc) is made by inserting the hook into a stitch, yarning over and pulling up a loop, then yarning over again and pulling through both loops. It produces a compact fabric suitable for structured sections.
The half double crochet (hdc) begins with a yarn over. Insert the hook, yarn over and pull up a loop, then yarn over and pull through all three loops. You may also use double crochet (dc) for taller sections and slip stitch (sl st) for joining or finishing.
How to Crochet the Baby Bootie Sole Step by Step
Before beginning the complete pair, create a small gauge swatch. Gauge is particularly important when making wearable items because differences in yarn, hook size, and personal tension can significantly affect the finished measurements.
Measure the baby’s foot when possible, or work from an appropriate sizing reference for the intended age range. Allow comfortable room for movement rather than creating a bootie that fits tightly against the toes.
Begin the crochet bootie sole with a foundation chain. The length of this chain determines much of the final sole length, so compare it with your intended measurement before continuing.
Starting in the appropriate chain, work stitches along one side of the foundation. At the final chain, place multiple stitches into the same space to create the rounded toe section.
Continue working along the opposite side of the original foundation chain. Add the required stitches around the heel so the piece forms a smooth oval. This creates the basic foundation of the crochet baby shoe.
Work additional rounds around the oval, placing increases primarily around the curved toe and heel areas. Check frequently that the sole remains relatively flat. Make the second sole using exactly the same sequence so both booties match.
Shaping the Sides, Toe, Ankle, and Cuff
Once the sole reaches the correct dimensions, begin creating the sides. Work a round without the same increases used for the sole. This encourages the fabric to turn upward instead of continuing to expand outward.
Continue around the crochet baby bootie, maintaining an even stitch count until the sides reach the required height. Working through a selected loop for the first side round can create a defined transition between the sole and upper if desired.
Mark the center of the toe and identify an equal number of stitches on both sides. The decreases used for shaping should remain centered so the finished bootie does not twist toward one side.
Work around the heel and sides normally, then place crochet decreases across the marked toe section. Repeat gradual decreases over subsequent rounds until the upper begins to curve neatly over the front of the foot.
After shaping the toe, continue working around the ankle. The opening should be comfortable and flexible rather than restrictive. Test the stretch gently before completing additional cuff rounds.
Finish with a simple crochet cuff using single crochet, half double crochet, or another soft stitch. A contrasting color can make the cuff stand out and provide an easy decorative detail without changing the basic construction.
Finishing, Sizing, and Customizing Baby Booties
When the crochet work is complete, fasten off and leave a yarn tail long enough to weave securely. Thread the tail through a yarn needle and pass it through several stitches before changing direction and weaving again.
Inspect the inside of each Crochet Baby Bootie carefully. Loose yarn ends or bulky knots can be uncomfortable, so keep the interior as smooth and tidy as practical.
Compare both finished booties side by side. Check their sole length, width, toe shaping, ankle height, and cuff. Small differences can sometimes be corrected during gentle blocking if the yarn responds appropriately.
For a minimalist look, keep the booties in one color. For a more playful design, use contrasting yarn around the sole or cuff. Simple stripes can also be incorporated while keeping the overall construction unchanged.
When making baby items, securely embroidered or crocheted-in details are generally preferable to loose decorative components. Avoid small detachable pieces that could present a choking hazard, and do not add long cords or ties that could create an entanglement risk.
Care for the finished crochet baby booties according to the yarn manufacturer’s instructions. If they are intended as a gift, consider including the fiber content and washing instructions so the recipient knows how to clean and maintain them properly.
FAQ About the Crochet Baby Booties Pattern
Is this Crochet Baby Booties Pattern suitable for beginners?
Yes. It is suitable for crocheters who understand basic stitches and are ready to practice working in rounds, increases, decreases, and simple shaping.
What crochet terminology does this tutorial use?
The tutorial uses US crochet terms, including chain, single crochet, half double crochet, double crochet, slip stitch, increase, and decrease.
What yarn should I use for baby booties?
Choose a soft yarn suitable for baby items and comfortable against sensitive skin. Washability can also be an important consideration for frequently used baby garments.
Why is gauge important?
Gauge determines the relationship between stitch count and finished dimensions. If your stitches are significantly larger or smaller than expected, the booties will also change size.
How do I determine the correct bootie size?
Foot length is more reliable than age alone. When possible, measure the intended wearer’s foot and compare it with the sole as you work.
How do I make the booties larger?
Adjust the sole dimensions first. Depending on your gauge and construction, you may need additional foundation stitches or rounds before beginning the sides.
How do I make smaller crochet booties?
Use measurements to reduce the sole proportionally. Simply changing the hook size without considering gauge can produce unpredictable results.
Why is my crochet sole curling?
The curved sections may need different increase distribution, or your tension may be too tight. Check the sole on a flat surface after each round.
Why is the sole becoming wavy?
Too many increases can cause rippling. Review the increase placement and make sure extra stitches are concentrated where shaping actually requires them.
How do I shape the toe?
Mark the center front and distribute decreases evenly across that section. Gradual shaping generally produces a smoother result than reducing too many stitches at once.
Can I make the booties in different colors?
Absolutely. Pastels, neutrals, bright colors, stripes, and contrasting cuffs can all work beautifully.
Can I add buttons or beads?
For baby items, avoiding small detachable decorations is the safer approach. Decorative effects can instead be created with contrasting yarn, stitch texture, or securely worked crochet details.
Can I add ties around the ankles?
Long cords and ties can create entanglement hazards for babies. A properly sized, stretchy cuff provides a simpler alternative.
How should I wash crochet baby booties?
Follow the care instructions for the specific yarn used. Keeping the original yarn label is helpful for remembering the correct washing and drying method.
Conclusion
The Crochet Baby Booties Pattern demonstrates how a small foundation can gradually become an adorable three-dimensional crochet project. Beginning with an oval sole provides the basic shape, while even rounds build the sides and carefully positioned decreases form the toe. A comfortable ankle section and simple cuff complete the classic bootie silhouette.
Throughout this tutorial, you learned how to select suitable yarn, check crochet gauge, create a foundation chain, build an oval sole, work single crochet, half double crochet, increases and decreases, shape the toe, form the ankle, add a cuff, weave in yarn ends, and adjust the design according to measurements. These techniques are valuable not only for baby booties but also for many other small crochet garments and accessories.

